Bling bandanas are very popular. I see lots of women wearing them. I see them at every bike rally, lots of craft fairs and boutiques around town, and online all over the place. I have seen them go for as much as $60.00 a piece.
Would you like to know how to make you own custom designed bling bandana? And for a fraction of that cost. I can tell you how to make an amazing Bling Bandana for way under $20.00 or even under $10.00.
I enjoy making them and I am going to tell you how you can make your own.

There are 3 main steps when creating your own Custom Designed Bling Bandanas.
Step 1: Pick Out A Patterned Bandana
There are thousands to choose from. The options are endless. I like to look in fabric stores, craft stores, and especially online. I always make sure there in an equally centered design.
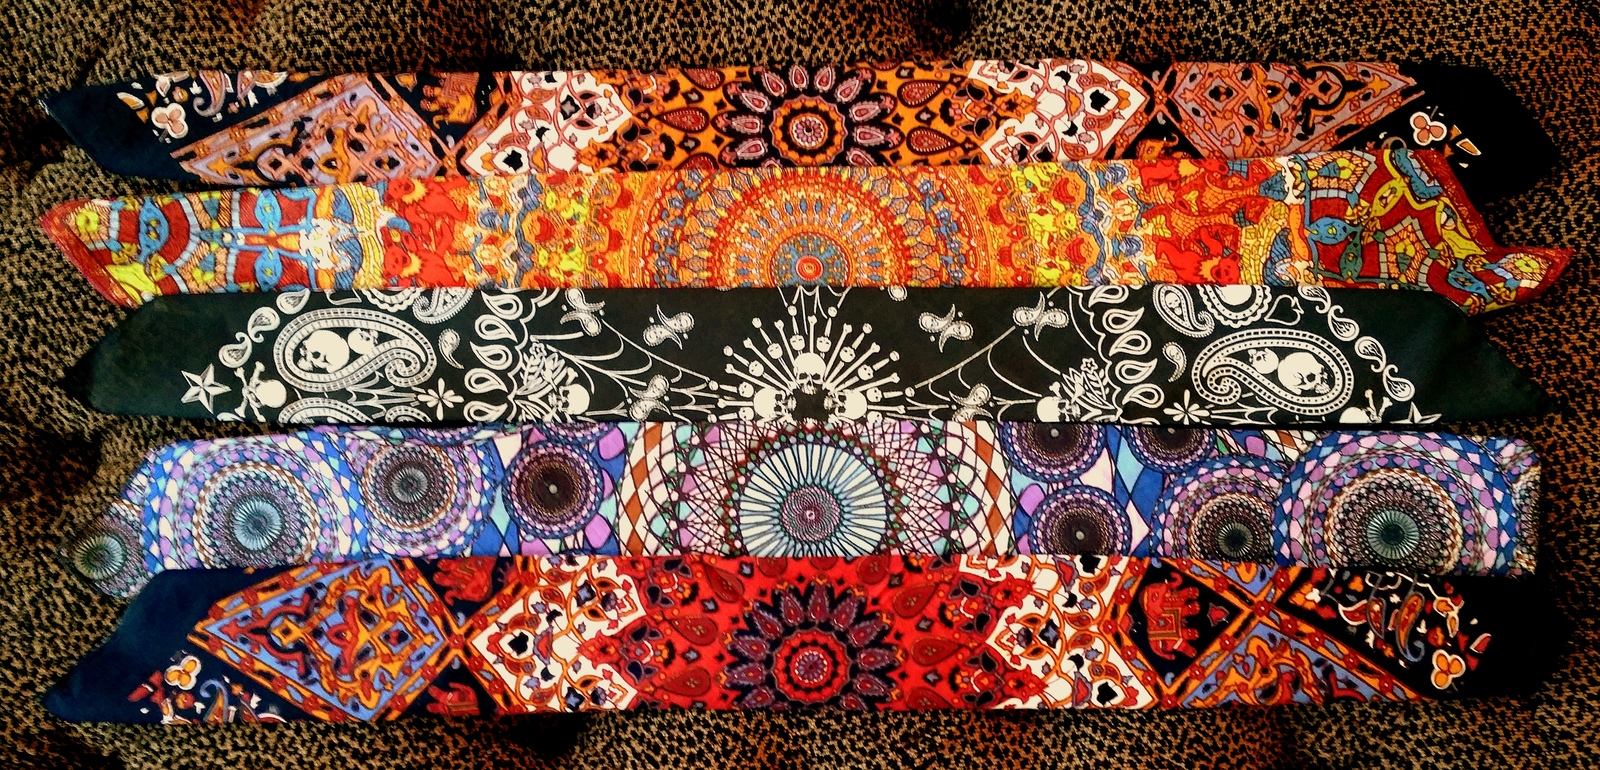
Here are a few of my favorite bandanas to use:
Here is a great motorcycle bandana. It is a cool skull bandana with white skulls and a little spider webbing on black material. The pattern and design is great for adding the bling. This plain bandana is about $5.00 online.

#2 – Sunshine Joy Grateful Dead Vibrating Bear Bandana
This beautiful Grateful Dead Dancing Bears bandana is gorgeous. The colors are bright and vibrant and really stand out. It looks amazing with any hair color. Once you add your beautiful blingy crystals, this bandana is a true gem — a real sparkler. Everyone comments how cool this bandana looks. It is very popular. This bandana is about $ 7.50 w/o the bling, online.

#3 – Solid Bandana
This is a classic bandana — a cowboy paisley bandana with a nice star design in the middle. It works well when folding the bandana. You can fold it so you have a crescent moon design, or make it larger and have the whole star design showing — depending on what you like. This is a very versatile bandana. These come in just about every color under the sun. You can find these online w/o the bling for about .99.

Now that you have chosen the bandana that you’d like to work with, let’s go on to Step 2: How To Choose Your Bling.
Step 2: Choose Your Bling
For the bling bandanas that I make and sell, I always choose Swarovski crystals.
Swarovski crystals are brighter and more shiny in my opinion than the other kinds of crystals you can buy. These dazzling crystals come in an assortment of finishes, colors, sizes and shapes. They are sure to spice up your bandana headband.
A Swarovski color and size chart is a handy thing to have around when deciding what colors you’d like to have on your bandana, especially if you plan on making several of them.
Less expensive brands of crystals are available. But some are made out of plastic and don’t have much sparkle or pizzazz. Here is an example.
Both types of crystals come in several colors and sizes. There are 2 ways to secure these crystals to your bandana and that brings us to Step 3: How To Secure Your Bling.
Step 3: Secure Your Bling
There are 2 ways to add crystals to your bandana headband:
- Glue
- Heat
Flatback rhinestones or crystals can be applied onto your bandana using glue.
I’ve used E6000 glue. You can use any type of crafters glue.
Hotfix rhinestones or crystals are applied using heat.
The back side of a hotfix rhinestone is flat and grey in color. You can see that glue has already been added to the flat surface. Hotfix gems are added onto your bandana using heat. You can do this using an iron, a hot fix tool which you can purchase at most hobby stores, or what I use: a heat press. If you plan on making one or two I’d use an iron, but if you plan on making a lot, a heat press is something that is much quicker and a good investment. You can find one, a good one for about $140.00. I know that seems expensive, but if you plan on making them to sell, or make a lot of them it is well worth it.
It is important that you are careful when using the hotfix crystals/rhinestones because once applied, the gem is permanent, it cannot be moved or removed and will not come off of your fabric.
Once you’ve decided on how you’d like to add the crystals, practice, experiment and have fun with it!
Once you added all your crystals, put it upside down on a flat surface, fold it diagonally, make the first fold about 2″-3″ and then put a few more folds in it and place in on your forehead and tie. This step may take a little practice, but you will get the hang of it.
There you have it. You can make your own Custom Designed Bling Bandanas. It is creative and fun. It is pretty easy and a great DIY project.